The Best Way to Cover Drywall Corners

The Best Way to Cover Drywall Corners
In any home or business, you’ll find walls with finished corners. These are known as mitered corners and create a nice visual effect in your space. Drywall is commonly used to finish the walls in homes, offices and other buildings because of its affordability and ease of installation. If you’re covering your own walls with drywall, you may be wondering about the best way to finish corner details. You will need to install a piece of plywood to cover the area where one wall meets another, but what about the corners? Let’s take a look at some common solutions and their benefits.
Taping the Corners
If you have a small space, you can save a few bucks by taping the corners of your wall. This is a quick and easy solution if you’re in a pinch, but it won’t give you a great-looking finish. If you choose this method, cover both sides of the corner with a strip of joint tape and trim the excess with a utility knife. Make sure the tape is pressed firmly against the corner. Then apply joint compound over the tape to finish the corner. This is a good solution if you’re painting the wall, but you may want to consider a different method if you plan to stain the wall. We’ll go into more detail about the different types of finishes you can achieve later in this article.
Drywall Corner Covers
The best way to finish your drywall corners is by using corner covers. These are usually made from metal or plastic and come in many different shapes, sizes and colors. Some corner covers have a built-in bead that adds a decorative touch to the corner. Corner covers are easy to install and cost less than other methods of finishing your corners. The covers are pressure-sensitive and conform to your wall’s shape. You can find these covers at most hardware stores and home improvement centers in a wide range of colors. Corner covers are easy to install. You can apply them over a freshly applied coat of joint compound, or you can use them to cover the seams of your drywall ceiling.
Installing a Beaded Ceiling
If you want to create a beaded ceiling in your space, you can do so using corner covers. Though this looks amazing, it’s not recommended for beginners. You may want to hire a professional for this one. If you’re determined to try it yourself, here are a few tips. First, cut a piece of drywall to fit the corner. Then, apply a thin coat of joint compound over the corner and the drywall. Place the corner cover on the corner and use a putty knife to press the corner cover against the drywall. Now you can paint or stain the corner cover to create a beaded look. Again, make sure to wait until the joints are dry before finishing the rest of the work.
Drywall Corners Using a Marring Tool
One of the best ways to finish your corners is by using a marring tool. This device is a small piece of metal that has a sharp edge on one side and a dull side on the other. You can use the sharp edge to create a decorative impression in your drywall corners just like a beading tool. Cut the drywall at a 45-degree angle on both sides of the corner then press the tool into the joint. This creates an attractive border around the corner of your wall. Just make sure to avoid pressing the tool too deeply or you can puncture the drywalls surface.
Corner Covers with Drywall Joint Tape
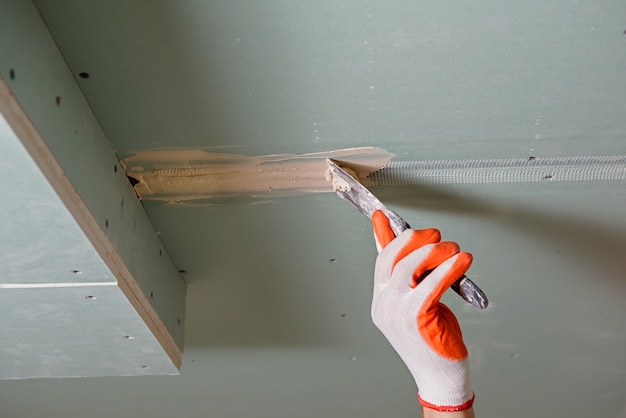
Some corners require a little extra support, so you may want to use drywall joint tape to cover the corners. This is a great solution if you need to support heavy objects or are installing a light fixture. Cut a piece of drywall joint tape to fit each corner, then apply the tape to both sides of the corner. Let the tape dry thoroughly before you apply a second coat of joint compound. This method is a bit more time-consuming, but it’s still an easy way to finish your corners. If you’re installing lights in your space, this is a great way to add support to the corners where the lights will be mounted. This will prevent the lights from pulling down on the corners and causing cracks in the drywall.
The 3 Way Corner with 3Way vs Drywall Joint Tape
3 way corners (Ceiling meeting 2 walls) are done traditionally with 3 tapes overlapped. There are lots of problems with the old method and here are a few to think about: Inconsistent angles (lower quality), high skill sculpting (higher labor costs), more sanding and dry time (more time consuming).
Here are some of the features of 3Way that give you an advantage over traditional drywall corner finishing methods:
•Install in just a fraction of the time
•Adjustable 90° corner angle (for framing that is just not quite right!)
•Reinforced backing to cover gaps and drywall board defects
•Bevelled edges to blend into tapes and drywall
•Perforated edges to ensure bonding to drywall with mud to avoid those pesky call backs for touch ups!
Conclusion
There are many ways to finish your drywall corners and corners. You can use corner covers like no-coat or beaded border around your outside corners. You can use the 3Way corner to give the best finish with the least amount of time and skill in your inside corners. The best way to finish your inside corners is by using a combination of these techniques no-coat or paper tape.